Like I said in my previous post (Using Giveaways to Increase Your Facebook Fans), this is NOT an easy to navigate App. I still get lost and just start at the beginning again when I'm trying to get to certain areas. So here is my best attempt to explain how to set up and use the App to get more fans. These directions may not be exact. Bear with me. I apologize if it's confusing or needs correction.
First
1. You must find the app!! One might try searching for Sweepstakes on FB. Or you can use this link.
2. On the right hand top of screen click on "Create your own giveaway". This will bring up a new window from Floodstreet prompting you to add it to your page. If you haven't done so already then you must do this in order to continue.
3. Go ahead and click on "Add to my page". This will bring up another window. Follow the prompts to add it to your fan page allowing it access as needed.
4. After all of that you should finally be set up to begin listing a giveaway!!
Now, If you've already done the above and have the App set up then you can start from here.
1. From YOUR fan page click on the sweepstakes link. It is a blue tile with a white S on it.
2. Click on the orange button marked "Manage giveaways".
3. You'll now find yourself at your Giveaway Schedule page. Here you can see past, current, and future giveaways of yours. To make a new one click on "Create a new giveaway"
4. This is the important page. In order to get more likes (which is why you're here in the first place) you MUST enable the very top option. "Display giveaway on the Stumbler?" YES, click "Yes I want this giveaway to appear on the Stumbler". It will take AT LEAST 24 hours to be approved and to see the likes trickle in but you HAVE to enable this.
Filling out the rest...
Target location - where are you willing to ship to? If your item is digital, paper, or a gift certificate I'd suggest making it worldwide. If its something heavy or large you can choose local (knowing you wont reach as many people). You can also choose just the US or whatnot. All up to you. Everything here on out is up to you.
Category - Pick one relevant
Shipping cost - Are you picking up the shipping tab? If not then let people know how much they'll be paying.
Start End Dates - up to you. I usually go 1-2 weeks. Maximum duration is 1 month.
Name of Items - um, the name of what you're giving away...
Giveaway Title - I'd say to use A or An before the title. They say for example "Win a ..." I'd remove Win and leave the A. Just because it works better when it's linked. You'll realize this later. Up to you. you can always change it ;-)
Short Description - Quick blurb for why people should enter your contest.
Full Description - Give all the info you want. Links. Measurements. Colors. Whatev. Or don't. But you can not tell people they have to jump through hoops to enter. (If your aim is to get views in your virtual shop you can make the listing for lets say "One Item in the XY shop" or "A $10 gift certificate at the XY shop". These listings will do double duty. 1. bring people to your FB page and likes, 2. bring traffic to your online shop. Sweet. Well IRL shop if you're lucky enough to have a brick and mortar. You lucky duck you!!) Also explain disqualification rules if you have them and shipping costs.
Estimated Product Value - Optional to provide. If it's more than say... $20, I'd list it. Which reminds me... ahh!!
Give the Referrer the same prize? - UP TO YOU!! I have allowed it on all of my giveaways because I can afford it. But so far I've not had to give away 2 prizes for any contest. Not everyone is referred and a lot of people don't share it with their friends.
Photo - Make it clear, make it attractive. Make it count!
5. Hit Save Giveaway!! yay!!
Now check out your handy work. Make sure to take a count of how many likes you had before it began. Then if you've put it on the Stumbler be sure to WAIT at least 24 hours for it to be approved. Hopefully your contest goes longer than 24 hours... You can click on the title of the giveaway to view its details. Share the link with your friends etc. My recommendation is to enter the contest yourself! (you can disqualify yourself under the contestants tab). Then you can share it on your page. I'd also copy and paste the link onto the fan page AS the fan page so that anyone not on YOUR friends list but who already like your page can see it and enter and share as well.
Promote Promote Promote!! But don't be a nasty spammer. Boo!!
If I've confused you immensely then please just check out their Help Page. I haven't viewed it too much but there's good info there I'm sure. Also if you want to go back to the Sweepstakes after you've closed the window/tab/ shut down your computer or whatever then just go to your fan page and click the App Tile. It will be near the top. If it's not showing (timeline layouts) then you might want to click the down triangle button to the right of your Likes. See it? I hope so. Have fun!! And please feel free to link your giveaway in a comment here with a quick blurb about what can be won.
Thanks for reading! I promise I'll figure out screenshot on a Mac... in the near future.. I'm an excellent procrastinator. hah
Xo,
Bri
p.s. One last thing and I swear I'll shut up. When promoting your Giveaway don't tell people to "like your page to enter" no. Don't even say that. Just say "Enter to win my giveaway for XY here!! It takes less than 30 seconds!!" or something similar. But if you tell them to Like your page they will assume that "Oh all I have to do is like and I'm entered" when that's not true at all. Eliminate confusion. When entering the App will let them know that they have to like the page in order to be entered. Ball in their court and you're not the bad guy ;)

Bri is simply your twenty something mother next door who loves to get crafty in between diaper emergencies and games of peek-a-boo. Etsy:http://www.BriSplit.Etsy.com Facebook: http://www.facebook.com/pages/Bris-Crafty-Shop/200945323320604 Twitter: http://www.Twitter.com/BrisCraftyShop
Monday, April 23, 2012
Thursday, April 12, 2012
Book Cover Tutorial


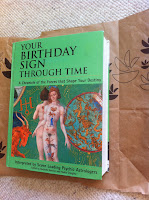
These past couple of weeks I've been adding MIL Nan's beaded jewelry to my shop. The pieces are SO gorgeous. For instance this necklace on the left is made with hand painted beads. The beads already have striped effects on them and the painted dots just bring a bit more POP! I love it. And if you look closely you can see the brown beads have a pattern of bronze spots underneath their shiny coat. So marvelous. This piece is made with a strong magnetic clasp to keep it tight.

Below you can see the Turquoise and Jet necklace that is also in the shop. It too is ever beautiful. BUT the aquamarine book underneath is too dang bright! I can't use it with too much else. I think it works for this piece but not the others. So, hence this tiny tutorial. Let's begin.
Reasons to cover your books:

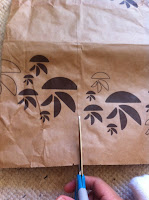 Step 2. Make sure that the bag is tall enough to fit the book you're starting with. Find the seam and cut it down the bag towards the bottom.

 Step 3. Lay the paper flat in front of you, because people don't work from behind or the sides.. you silly. Here is where you can decide if you'd like to use the outside or the inside of the bag as the cover. For this tutorial I'm using the inside, but in the other photos you will see that for my small book I used the outside. I liked the abstract jellyfish design that the local grocery store has as their symbol.


 And Voila! You've got a book cover that only cost you a weeks worth of groceries ^_^
- School mandate
- A craft for creative wee ones (they'll love decorating them)
- To create dust jackets
- Just to make things simple and cohesive ...
- For photography purposes and staging.
And here we go.
Step 1. Grab your supplies. You're going to need A clean paper bag, preferably without wrinkles, scissors, your book(s), and tape (optional).

 Step 2. Make sure that the bag is tall enough to fit the book you're starting with. Find the seam and cut it down the bag towards the bottom.
 Continue around the base of the bag removing the rectangle.

 Step 3. Lay the paper flat in front of you, because people don't work from behind or the sides.. you silly. Here is where you can decide if you'd like to use the outside or the inside of the bag as the cover. For this tutorial I'm using the inside, but in the other photos you will see that for my small book I used the outside. I liked the abstract jellyfish design that the local grocery store has as their symbol.
 Anyhow, lay the book in the center so that there is room above and below it and be sure it can wrap around completely.
Step 4. Fold the bag inside the front and back of the cover.

Step 5. Making nice creases fold the top and bottom over. you'll be using these as guidelines next.

Step 6. Unfold and remove the book, Don't worry! You're almost done ;) Now fold up the bottom edge and fold the top edge down. Use the book as a reference if necessary.

Step 7. So close. Tuck the jacket flaps around the book cover ends like so. And make sure it's not SO tight that it rips the corners.


Now you can let the kiddies decorate them with fun things, leave them plain, add a doily? I might do the latter in a while but my doilies are red right now.. bleh. Hope you liked it!! Pin away XD.
Xo,
Bri
Thursday, April 5, 2012
Giveaways to Increase Your Facebook Fan Count
Thanks to a Blog I read on Blogging Basics 101 I have gained 200/300 of my most recent FB fans.
My reason I'm thanking them? I was scared outta my mind with all the lawyers fees and waste of time that I might suffer from doing an improper giveaway on FB. I'm not trying to get in any kind of trouble, No way no how!!
So I'm often asked about how I've gotten so many views? How do you get so more traffic to your FB page? Here's my answer:
There is an app on Facebook titled Giveaway but when you click on it it's called Sweepstakes. You can see it from my fan page it has an icon of a white S on a blue tile. If you use this app to conduct a giveaway, then you will not be in violation of any of Facebooks Terms and Conditions for doing giveaways. Otherwise you can ask FB permission and jump through this hoop, that hoop, and the other hoop and cross your fingers and toes and hope they allow it... Or just do one on there anyway and hope to pop they don't close your account and fine you.
 And that brings us back to this App. It is NOT easy to understand. But I've used it twice and will use it here again since it's a new month, to do giveaways that have amounted to 2/3 of each like on my fan page. That's 200/300!! And it cost me one listing of baby headbands and then one listing of envelopes... seriously. that's it. one listing of envelopes for 100 likes. haha. I loved it. And that's not to say you can't give a sample of something, it's up to you!
But again it's NOT easy to figure out. so...
Other things you can think to do to drive traffic to your site:
My reason I'm thanking them? I was scared outta my mind with all the lawyers fees and waste of time that I might suffer from doing an improper giveaway on FB. I'm not trying to get in any kind of trouble, No way no how!!
So I'm often asked about how I've gotten so many views? How do you get so more traffic to your FB page? Here's my answer:
There is an app on Facebook titled Giveaway but when you click on it it's called Sweepstakes. You can see it from my fan page it has an icon of a white S on a blue tile. If you use this app to conduct a giveaway, then you will not be in violation of any of Facebooks Terms and Conditions for doing giveaways. Otherwise you can ask FB permission and jump through this hoop, that hoop, and the other hoop and cross your fingers and toes and hope they allow it... Or just do one on there anyway and hope to pop they don't close your account and fine you.
And that brings us back to this App. It is NOT easy to understand. But I've used it twice and will use it here again since it's a new month, to do giveaways that have amounted to 2/3 of each like on my fan page. That's 200/300!! And it cost me one listing of baby headbands and then one listing of envelopes... seriously. that's it. one listing of envelopes for 100 likes. haha. I loved it. And that's not to say you can't give a sample of something, it's up to you!But again it's NOT easy to figure out. so...
Other things you can think to do to drive traffic to your site:
- Request that someone who does have a following on their blog do you a solid and run a giveaway for you. I havent done this yet but I'm thinking about it. Can't get a yes if you don't ask :D
- If you do decide on a non-app via FB giveaway, make sure to Invite all of your FB friends prior to holding it. And then I don't think it will allow you to invite again (spam like).
- Have it on your business cards
- Do random trivia or involvement posts from your FB page. Open ended questions, opinion questions.
And that's just the ideas I can come up with off the top of my head.
So back to the top. Blogging Basics 101 made it easy for my to understand the T&C of FB (acronyms for everything now-a-days, sheesh) and therefore I decided personally that it would be most simple and not in violation of anything to go with that App. There may be other Apps I'm unaware of, and I'm not saying they're not good or whatnot but you should consider all of the ways they work before chosing one. Or you can chose a giveaway on all of them and go from there?
I hope that sometimes soon they will take a hint and reconfigure their app, but for now I just deal and be grateful ^_^
That's all I've got for now. Any questions?
Xo,
Bri
Oh one last way to get more traffic is, explain something in a post, blog, video, whatever on the site you're trying to get people to. (For example, I wanted more blog views... so I wrote THIS blog in hopes that I can direct people here and bring traffic, as well as provide a landing spot for all this information. It's a lot to type out multiple times ^_^) And then mention a link to it or a little about it as a response to any questions. Or offer it to people, "Hey I wrote a blog about how to get more FB fans.. check it out ^_^"
Sorry if I seemed tricky. Did it work?
-----------------------------------------------------------
Update: View my blog regarding setting up a Giveaway with this App here: Using the Giveaway Sweepstakes App on Facebook.
Sunday, April 1, 2012
Amazing Origami Rock Tutorial
 There's a trend right now with Origami this and that. All you have separating you from complete awesomeness is a piece of paper and some know how. Fret not dear friend. With these simple instructions you too can be the envy of so many.
Ready?
Grab your most stellar piece of paper. If you have it, use a realistic earthy colored sheet. Or try using watercolor in shades of grey on a white paper. Make sure to let it dry completely first as to prevent tearing. Rocks don't have tears in them, duh.
Instructions:
1.Take your piece of paper and cut it into a rectangularish shape.
2. Fold in each of the corners in to the center.
3. Fold in the new points in to the center as well.
4. Fold the paper into thirds.
5. And fold that into thirds.
6. Unfold the last three folds
7. Flip it over.
8. Fold in half lengthwise.
9. Fold accordion style pleats, as many as you can fit!!
10. Unfold everything completely. Now crumple it up loosely with the harsh edges and corners tucked in underneath,
BAM!! You just made an amazing Origami rock! Give yourself a pat on the back. Now go ahead and tell your oh so gullible friends you just found a tutorial for The Most Amazing Origami Rock ever, by Bri ^_^
Enjoy! Happy April 1st.
Xo,
Bri
BrisCraftyShop.Etsy.com
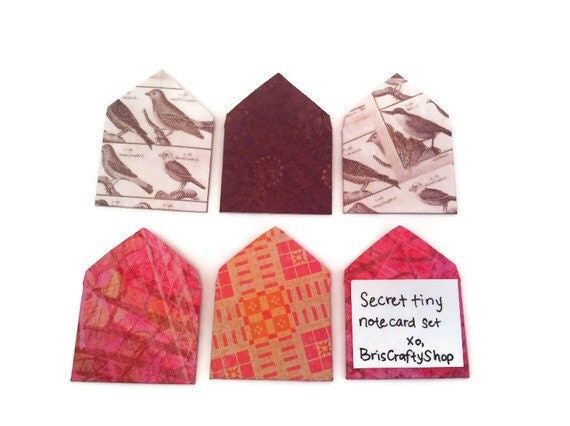
P.S. Check out the listing here and give it a heart if it make you giggle ^_^
Subscribe to:
Comments (Atom)