Thursday, November 22, 2012

Happy Thanksgiving! Blueberry Pie Bars

I am so thankful to have a man that takes care of us. A roof over our head. That our health is on the up and up. And that I don't have to cook a whole Thanksgiving dinner! This year we were invited to Hubby's cousins home an hour East about. And I never come empty handed. So I decided to try a recipe I saw on Pinterest for Blueberry Pie Bars. Yum!!


A recipe that uses one mix for both the crust and topping?! I had to jump on this train. It was so easy. Be sure to not mix things too much. And stick the topping in the fridge till you need it if it's warm in your home. The whole point is to keep your butter chilled till baking.


This was a perfect idea for Thanksgiving! I baked it up in the prefect brownie pan and got 16 pieces but left them in the pan and made sure not to cut through completely (there was 18 but I ate two, shh!!). Once they cooled I put the whole thing in the fridge over night to set up. This morning I unmolded it and cut the 16 in half each so 32 pieces ready to go, bite size!

Here's what it looked like once it was out of the oven all golden brown. I probably cooked it an extra 30 minutes because I'm always paranoid about undercooking my food. I'm just thankful it wasn't burnt!


The original recipe from Life's Simple Measures

And here's how I did it

Ingredients:
Crust and Topping:
1 c. all purpose flour
1/2 c. whole wheat flour
3/4 c. sugar
1/8 tsp. salt
3/4 c. unsalted butter, chilled and cubed

Filling:
2 large eggs
1 c. sugar
1/2 c. sour cream
3/8 c. whole wheat flour
1/2 tsp. vanilla extract
splash of lemon juice
16 oz. fresh blueberries

Directions:
  1. Heat oven to 350°F. Grease your brownie pan (8x8 etc) with non stick cooking spray; set aside.
  2. In the food processor, combine the first four ingredients. Add the butter cubes slowly, processing until the butter is evenly distributed but the mixture is still crumbly.
  3. Reserve 1-1/2 cups of the mixture for the topping; set aside.  Press the remaining mixture into the bottom of the prepared pan.
  4. In a large bowl, whisk eggs, mix in the next five ingredients.  Gently fold in blueberries.  Pour over the crust and sprinkle the reserved topping mixture evenly over the filling.
  5. Bake 45 to 55 minutes or until top turns golden brown.  Cool 1 hour. Cut carefully and serve or cool over night in the fridge and cut. Enjoy!


I used the frozen blueberries from Cooperstown earlier this summer and it was delicious! I also used up leftover cinnamon sugar from an earlier project. It was only 1/4 cup and it barely made a difference ^_^ Probably I should have mixed it with the topping only. And I splashed a little lemon juice in the filling too.

Let me know if you make it and what changes you'd make!
xo,
Bri

Monday, October 15, 2012

Updates

**This blog was written before "son rise". While researching how to clean the stench from vintage luggage, closing a third gmail account, and crocheting.

Updates. They make me crazy! Why does the world have to move so fast? Don't people miss not knowing everything about everyone else? And then Pinterest comes along and nobody can keep up with the Joneses anymore. It's like Americans are losing their mind from all of these social updates. Make it stop!

And then she unplugged the laptop and lived happily ever after. 3000 miles away from her newborn niece and happy family. And her and her son and hubby did not concern themselves with what people ate. Or how anyone else felt. They focused only on each other, and loved it. They missed out on who went where and with whom. And as it was an election year they missed out on the bombardment of political propaganda. Since they never spoke ill of any U.S. President, present or former, they were elated. They missed out on the best photographed blogs and feeling like they weren't doing enough things for their family and home.

End dream sequence.

I have to unplug. For the safety of my family AND the sanity of myself. But I'll still be back. It'll just be scheduled. Like when you used to go to the library. You wouldn't spend all day there willy nilly... Ok, some of us actually did. Bad example. um.. The Dmv? Only more distracting? Or Ikea? haha. That is what the internet is like to me. Ikea, the dmv, the library, everything and more all wrapped up into one laptop.

So, for now I think every other day will be internet free. On my phone too. Well, no social update apps.  No Pinterest or Safari. Only camera, text, phone/facetime. AND ETSY of course.

It feels like every time I check my phone I'm saying "son this is more important than you".
I have goals dangit! And these updates are delivering too much pressure. Being a perfectionist doesn't help. I feel like, no matter what I do for my family that it's not enough, that I could be doing more and better and healthier and prettier and made from scratch and all natural and home grown etc etc. Slow the train down. *sigh*
That's not fair to me. I shouldn't feel that way. And I don't blame the internet. I blame myself. But instead of throwing a pity party I'm here organizing my thoughts and a plan of action. Now I have to go and put that in effect.

The son is up. Today internet. Tomorrow not. See ya!

Wednesday, August 15, 2012

Inspiration

What inspires you? Today, test yourself. See if you can't find inspiration in the most random of places. How about at exactly 5pm you look around and find any one thing and think about it. Does it move? How? Is it vibrant and bright? Dull and dingy? New? Old? Let it pique your interest.

I'd like to show you something I've pinned to my "inspiration" pinterest board. 100 Creative Sites That Might Inspire You - Splashnology. Since you're already on the internet, why not look at awesome websites like this: Forgotten Colours. This is my first time checking it out. It is apparently an app/book available for the Apple iPad. I'm out of luck there, but I have an iPhone! Nope, there is an iPhone app for wallpapers though. I downloaded it and it's got a bunch of related backgrounds of awesomely done graphic art. If you're into that sort of thing then this might already inspire you.

Alright, so I've got about something like 6 hours and change. See you later!

xo,
Bri

Update - It's about 5:30 now. And 30 minutes ago, between rolling around on the sofa with a stomach ache and chasing my favorite little monster around I was inspired! My neighbors include a little girl who is so delightful. She saw the monster peeking out of our window and waved and played with him. Moments like that ^_^

Saturday, August 11, 2012

July Recap

That month flew by fast! And it's not to say I didn't keep up with the challenge. Oh no, I made at least a few things on my "to do" list. But the one thing I made specifically for the challenge... didn't quite get finished. You see, for the first time in my life I decided to make a dress for myself. I totally forgot that the pattern designer was probably a size 0-5 while my own numbers are in the double digits easily. So, that project is on the back burner until i can tweak things here and there. Then MAYBE I'll let you see how awful of a job I've done.

 Here is a picture of the best place to produce shop on our way to the summer house. We went up to the summer house at least twice. For $10 she gave us 3 cukes, 2 small bags of potatoes (white and red), a HUGE head of cabbage, two lovely big red onions and a small handful of tiny red onions, two bell peppers and two HUGE heads of fresh lettuce, one green and one red. Oh man these veggies were delicious!

Also while upstate I went blueberry picking with my in-laws ^_^ Ingalls blueberry hill is located in Cooperstown, I think highway 28? Either way it's across from the Dream baseball youth camp. You should taste fresh blueberries right from the trees, so delicious! As you can see from the small amount of blueberries in my bucket, I was a picky picker. I only wanted the darkest, biggest ones. Nothing wrong with that. They were all a little damp from the morning showers but when we got the haul home we dried them out on trays and froze most for later. When I got back to my home I made a blueberry dessert! If you'd like I can share this recipe later. I made two small "pies" and one large one. Then I ate a small one by myself because I'm greedy and it was good!


During the month of July I actually did many things.  I crocheted my second baby blanket (this one was a granny square type) for my son's Godfather's son who will be born here in a week or two. It took me a LONG time to finish with my little dude around. My son was very needy this month. I also took both the cars for their repairs and oil changes and inspections. I also, injured my back, went to multiple doctor visits, took the boy to doctor visits. Oh I had a hearing test because the hubby said "You must be going deaf, you never hear me" Well they did some serious testing and the results are, I can hear just perfectly! The tests were bordering on NASA testing if you ask me. Real trippy.


One last thing I can say I did make something that I saw on Pinterest. This covered charge cord. I first did it on my headphones using a lot of random colors and I loved it. So I did it again with a gradient of greens into yellow and then brown. I see people selling these on Etsy for an average of $25 or so. I'm not sure it would be a great idea to include them in my shop just yet. Right now I'm focusing on the mini envelopes. If you make this "Embroidered" type thing I recommend using a little super glue at the beginning and end at least. I also used glue every time I added a new color. It's a very simple method and I can show you how later if you'd like to know that also.

That's all for now. ^_^
xo,
Bri

Friday, June 29, 2012

A New Challenge

Blogging for me needs a purpose. And sure I like to talk, so I could say that this is my outlet for being a yakity yakker, but I think it needs something more substantial. So I'm going to try and Make Something New Each Month from Pinterest.

Tell me, if you're on Pinterest.. Do you not have a Board for "Crafts To Try" or "DIY"?? I have... 181 crafts pinned to my Crafts board. So I think that's a great reason to do them. I also have a "Crafts I've Done" board, it only has 11 pins.

So I'll begin with that board today. I have pinned DIY Wreath Form Less Than $1.


While out with DH at the hardware store I picked up a long (6'?) piece of foam pipe covers in the plumbing section. At home I simply cut it to the size I wanted and taped both ends together with duct tape. This photo is not my own but from a Gorgeous Moss Wreath tutorial from I {heart} Nap Time

After I made my wreaths I spent way too much time wrapping them with yarn. Around and around and around.. Only to have it later get squished and not be able to bend it back into shape :( Fail I'd say. So if you decide to make this yourself you may want to read this blog by Gail Made on how to prevent kinks. 


So that is all for now! I've got an idea where I'd like to go next with this adventure. Any suggestion? I'd love to hear from you.

Xo,
Bri

**P.S** My Pinboard is HERE and you can link in a comment which one you think I should do in July ^_^ I'd love that. If you can't figure out how to give the link you can leave a description. I can try and figure it out heh.


Monday, April 23, 2012

Using the Giveaways Sweepstakes App on Facebook

Like I said in my previous post (Using Giveaways to Increase Your Facebook Fans), this is NOT an easy to navigate App. I still get lost and just start at the beginning again when I'm trying to get to certain areas. So here is my best attempt to explain how to set up and use the App to get more fans. These directions may not be exact. Bear with me. I apologize if it's confusing or needs correction.

First
1. You must find the app!! One might try searching for Sweepstakes on FB. Or you can use this link.
2. On the right hand top of screen click on "Create your own giveaway". This will bring up a new window from Floodstreet prompting you to add it to your page. If you haven't done so already then you must do this in order to continue.
3. Go ahead and click on "Add to my page". This will bring up another window. Follow the prompts to add it to your fan page allowing it access as needed.
4. After all of that you should finally be set up to begin listing a giveaway!!

Now, If you've already done the above and have the App set up then you can start from here.
1. From YOUR fan page click on the sweepstakes link. It is a blue tile with a white S on it.
2. Click on the orange button marked "Manage giveaways".
3. You'll now find yourself at your Giveaway Schedule page. Here you can see past, current, and future giveaways of yours. To make a new one click on "Create a new giveaway"
4. This is the important page. In order to get more likes (which is why you're here in the first place) you MUST enable the very top option. "Display giveaway on the Stumbler?" YES, click "Yes I want this giveaway to appear on the Stumbler". It will take AT LEAST 24 hours to be approved and to see the likes trickle in but you HAVE to enable this.
Filling out the rest...
Target location - where are you willing to ship to? If your item is digital, paper, or a gift certificate I'd suggest making it worldwide. If its something heavy or large you can choose local (knowing you wont reach as many people). You can also choose just the US or whatnot. All up to you. Everything here on out is up to you.
Category - Pick one relevant
Shipping cost - Are you picking up the shipping tab? If not then let people know how much they'll be paying.
Start End Dates - up to you. I usually go 1-2 weeks. Maximum duration is 1 month.
Name of Items - um, the name of what you're giving away...
Giveaway Title - I'd say to use A or An before the title. They say for example "Win a ..." I'd remove Win and leave the A. Just because it works better when it's linked. You'll realize this later. Up to you. you can always change it ;-)
Short Description - Quick blurb for why people should enter your contest.
Full Description - Give all the info you want. Links. Measurements. Colors. Whatev. Or don't. But you can not tell people they have to jump through hoops to enter. (If your aim is to get views in your virtual shop you can make the listing for lets say "One Item in the XY shop" or "A $10 gift certificate at the XY shop". These listings will do double duty. 1. bring people to your FB page and likes, 2. bring traffic to your online shop. Sweet. Well IRL shop if you're lucky enough to have a brick and mortar. You lucky duck you!!) Also explain disqualification rules if you have them and shipping costs.
Estimated Product Value - Optional to provide. If it's more than say... $20, I'd list it. Which reminds me... ahh!!
Give the Referrer the same prize? - UP TO YOU!! I have allowed it on all of my giveaways because I can afford it. But so far I've not had to give away 2 prizes for any contest. Not everyone is referred and a lot of people don't share it with their friends.
Photo - Make it clear, make it attractive. Make it count!
5. Hit Save Giveaway!!  yay!!

Now check out your handy work. Make sure to take a count of how many likes you had before it began. Then if you've put it on the Stumbler be sure to WAIT at least 24 hours for it to be approved. Hopefully your contest goes longer than 24 hours... You can click on the title of the giveaway to view its details. Share the link with your friends etc. My recommendation is to enter the contest yourself! (you can disqualify yourself under the contestants tab). Then you can share it on your page. I'd also copy and paste the link onto the fan page AS the fan page so that anyone not on YOUR friends list but who already like your page can see it and enter and share as well.

Promote Promote Promote!! But don't be a nasty spammer. Boo!!

If I've confused you immensely then please just check out their Help Page. I haven't viewed it too much but there's good info there I'm sure. Also if you want to go back to the Sweepstakes after you've closed the window/tab/ shut down your computer or whatever then just go to your fan page and click the App Tile. It will be near the top. If it's not showing (timeline layouts) then you might want to click the down triangle button to the right of your Likes. See it? I hope so. Have fun!! And please feel free to link your giveaway in a comment here with a quick blurb about what can be won.

Thanks for reading! I promise I'll figure out screenshot on a Mac... in the near future.. I'm an excellent procrastinator. hah

Xo,
Bri

p.s. One last thing and I swear I'll shut up. When promoting your Giveaway don't tell people to "like your page to enter" no. Don't even say that. Just say "Enter to win my giveaway for XY here!! It takes less than 30 seconds!!" or something similar. But if you tell them to Like your page they will assume that "Oh all I have to do is like and I'm entered" when that's not true at all. Eliminate confusion. When entering the App will let them know that they have to like the page in order to be entered. Ball in their court and you're not the bad guy ;)


Thursday, April 12, 2012

Book Cover Tutorial


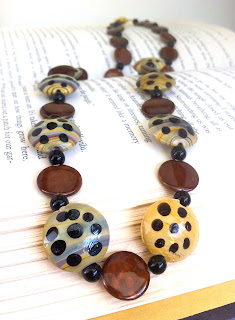
These past couple of weeks I've been adding MIL Nan's beaded jewelry to my shop. The pieces are SO gorgeous. For instance this necklace on the left is made with hand painted beads. The beads already have striped effects on them and the painted dots just bring a bit more POP! I love it. And if you look closely you can see the brown beads have a pattern of bronze spots underneath their shiny coat. So marvelous. This piece is made with a strong magnetic clasp to keep it tight.


Below you can see the Turquoise and Jet necklace that is also in the shop. It too is ever beautiful. BUT the aquamarine book underneath is too dang bright! I can't use it with too much else. I think it works for this piece but not the others. So, hence this tiny tutorial. Let's begin. 


Reasons to cover your books:
  • School mandate
  • A craft for creative wee ones (they'll love decorating them)
  • To create dust jackets
  • Just to make things simple and cohesive ...
  • For photography purposes and staging. 
And here we go. 

Step 1. Grab your supplies. You're going to need A clean paper bag, preferably without wrinkles,  scissors, your book(s), and tape (optional).

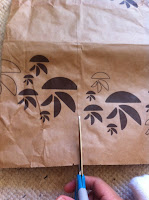
Step 2. Make sure that the bag is tall enough to fit the book you're starting with. Find the seam and cut it down the bag towards the bottom. 

Continue around the base of the bag removing the rectangle. 

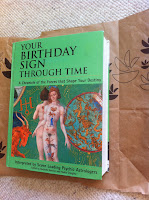
Step 3. Lay the paper flat in front of you, because people don't work from behind or the sides.. you silly. Here is where you can decide if you'd like to use the outside or the inside of the bag as the cover. For this tutorial I'm using the inside, but in the other photos you will see that for my small book I used the outside. I liked the abstract jellyfish design that the local grocery store has as their symbol. 
Anyhow, lay the book in the center so that there is room above and below it and be sure it can wrap around completely. 

Step 4. Fold the bag inside the front and back of the cover.

Step 5. Making nice creases fold the top and bottom over. you'll be using these as guidelines next. 

Step 6. Unfold and remove the book, Don't worry! You're almost done ;) Now fold up the bottom edge and fold the top edge down. Use the book as a reference if necessary.
Step 7. So close. Tuck the jacket flaps around the book cover ends like so. And make sure it's not SO tight that it rips the corners. 

And Voila! You've got a book cover that only cost you a weeks worth of groceries ^_^ 

Now you can let the kiddies decorate them with fun things, leave them plain, add a doily? I might do the latter in a while but my doilies are red right now.. bleh. Hope you liked it!! Pin away XD.

Xo, 
Bri

Thursday, April 5, 2012

Giveaways to Increase Your Facebook Fan Count

Thanks to a Blog I read on Blogging Basics 101 I have gained 200/300 of my most recent FB fans.

My reason I'm thanking them? I was scared outta my mind with all the lawyers fees and waste of time that I might suffer from doing an improper giveaway on FB. I'm not trying to get in any kind of trouble, No way no how!!

So I'm often asked about how I've gotten so many views? How do you get so more traffic to your FB page? Here's my answer:


There is an app on Facebook titled Giveaway but when you click on it it's called Sweepstakes. You can see it from my fan page it has an icon of a white S on a blue tile. If you use this app to conduct a giveaway, then you will not be in violation of any of Facebooks Terms and Conditions for doing giveaways. Otherwise you can ask FB permission and jump through this hoop, that hoop, and the other hoop and cross your fingers and toes and hope they allow it... Or just do one on there anyway and hope to pop they don't close your account and fine you.

And that brings us back to this App. It is NOT easy to understand. But I've used it twice and will use it here again since it's a new month, to do giveaways that have amounted to 2/3 of each like on my fan page. That's 200/300!! And it cost me one listing of baby headbands and then one listing of envelopes... seriously. that's it. one listing of envelopes for 100 likes. haha. I loved it. And that's not to say you can't give a sample of something, it's up to you!


But again it's NOT easy to figure out. so...

Other things you can think to do to drive traffic to your site:

  • Request that someone who does have a following on their blog do you a solid and run a giveaway for you. I havent done this yet but I'm thinking about it. Can't get a yes if you don't ask :D
  • If you do decide on a non-app via FB giveaway, make sure to Invite all of your FB friends prior to holding it. And then I don't think it will allow you to invite again (spam like). 
  • Have it on your business cards
  • Do random trivia or involvement posts from your FB page. Open ended questions, opinion questions. 
And that's just the ideas I can come up with off the top of my head. 

So back to the top. Blogging Basics 101 made it easy for my to understand the T&C of FB (acronyms for everything now-a-days, sheesh) and therefore I decided personally that it would be most simple and not in violation of anything to go with that App. There may be other Apps I'm unaware of, and I'm not saying they're not good or whatnot but you should consider all of the ways they work before chosing one. Or you can chose a giveaway on all of them and go from there? 

I hope that sometimes soon they will take a hint and reconfigure their app, but for now I just deal and be grateful ^_^

That's all I've got for now. Any questions?


Xo,
Bri


Oh one last way to get more traffic is, explain something in a post, blog, video, whatever on the site you're trying to get people to. (For example, I wanted more blog views... so I wrote THIS blog in hopes that I can direct people here and bring traffic, as well as provide a landing spot for all this information. It's a lot to type out multiple times ^_^) And then mention a link to it or a little about it as a response to any questions. Or offer it to people, "Hey I wrote a blog about how to get more FB fans.. check it out ^_^"

Sorry if I seemed tricky. Did it work?

-----------------------------------------------------------
Update: View my blog regarding setting up a Giveaway with this App here: Using the Giveaway Sweepstakes App on Facebook

Sunday, April 1, 2012

Amazing Origami Rock Tutorial

There's a trend right now with Origami this and that. All you have separating you from complete awesomeness is a piece of paper and some know how. Fret not dear friend. With these simple instructions you too can be the envy of so many.

Ready?

Grab your most stellar piece of paper. If you have it, use a realistic earthy colored sheet. Or try using watercolor in shades of grey on a white paper. Make sure to let it dry completely first as to prevent tearing. Rocks don't have tears in them, duh.


Instructions:

1.Take your piece of paper and cut it into a rectangularish shape.
2. Fold in each of the corners in to the center.
3. Fold in the new points in to the center as well.
4. Fold the paper into thirds.
5. And fold that into thirds.
6. Unfold the last three folds
7. Flip it over.
8. Fold in half lengthwise.
9. Fold accordion style pleats, as many as you can fit!!
10. Unfold everything completely. Now crumple it up loosely with the harsh edges and corners tucked in underneath,

BAM!! You just made an amazing Origami rock! Give yourself a pat on the back. Now go ahead and tell your oh so gullible friends you just found a tutorial for The Most Amazing Origami Rock ever, by Bri ^_^

Enjoy! Happy April 1st.

Xo,
Bri
BrisCraftyShop.Etsy.com

P.S. Check out the listing here and give it a heart if it make you giggle ^_^

Friday, March 30, 2012

Spring is here!


Yes so it has finally arrived.. in a blaze of YELLOW!! It's so crazy. I don't care for these flowers so much on their own but maybe with more vegetation they won't be so unappealing to me. I'm trying to decide on what, if anything, I should plant here. It's hard to see but the stairs lead up to the street and our driveway which wraps around and down on the left.

A family friend suggested Violets, so that is a possibility. Right now we have on the left side of the arbor Orange Honeysuckle (At least I remember it being orange and me saying 'ewww' heh) and thought DH tried to plant some Red Lilies on the left of it, I think the deer got to it before it could really take root. And I'm still attempting to grow Orange and yellow Nasturtiums on the right of the arbor. Oh yes and we have a great supply of Poison Ivy. woohoo...

I'd really like something RED to attract the hummingbirds. Whether it's a red chair or bird feeder or maybe red flowers.. I'm not sure yet. Somewhere in our garden which is a lot more than this picture, as we live on the side of a mountain, we will of course have a bunch of herbs. The Basil is already beginning to grow (pics in a future post, I promise). And I'll bring Oregano, Parsley, Cilantro and Rosemary into the equation as well. Fresh parsley would be awesome! And of course we're looking to grow some peppers. Bell peppers and spicy jalapenos.

Other things I'm interested in adding to the lot:

  • A, Jewelweed - Spotted Touch Me Not (Impatiens capensis) 
  • P, Candytuft (Iberis umbellata)
  • A, Alyssum - Royal Carpet (Lobularia maritima)
Of course I'd prefer perennials but I'm keeping my options open. Any thoughts as to what I should include? Oh, I'm looking for a vine too. I've got my eye on a night blooming Moonflower (A). 


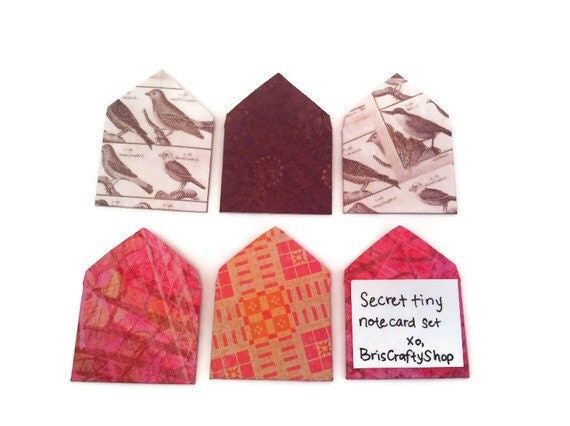
Here are my tiny envelopes! I've decided to just throw them all together willy nilly instead of having six of one kind and half a dozen of another. You can see them listed here

That's all for now. The boy is teething and getting depressed. It's really making it hard for me to get ANYTHING done. Happy Friday!!

Xo, Bri

Friday, March 23, 2012

DIY Photo Studio Light Box Tutorial


If you've ever seen those awesome Etsy photos of items just floating on a bed of white and wondered how the F did they do that? Your mouth agape in amazement. Well I'm here to show you how to go from alright to magnificent ^_^ Take for instance this photo at right of my sons first pair of Chucks. That's Chuck Taylors or Converse for those who don't know. This picture isn't terrible, for an iPhone photo anyhow ( I REALLY NEED A CAMERA). But when you place them into a photo light box thingamajig then, presto change-o:
they are suddenly one of the cutest pair of shoes you've ever seen. 


So let's start shall we :) First let's gather our supplies**:


  • One sturdy box larger than 12x12x12 if possible (Free if you've got one laying around)
  • Tape of some sort, preferably packing tape or duct tape (Also free if you can find it)
  • Tissue paper x 3 depending on how big of a box you've got (you guessed it, free)
  • An exacto knife, box cutter. I will not be held accountable for your dangerous stunts. Go buy a quality cutter!!! (Mine was probably $12 but I had a gift card = Free)
  • White posterboard and any other colors you'd like, though you should stick to black or white at first. NO crazy patterns. (This was a splurge. $0.30 a piece and I got two *cringe*)
  • And a cute little something you've got laying around (FREE)
  • Oh and you should also use: a ruler, and marker, or pen or pencil. 

Here we go. Not all steps are pictured, my apologies.
 PLEASE READ ALL STEPS BEFORE MAKING YOUR OWN ^_^ 
Also, prior to beginning, turn off all fans in your general area so as not to disturb the tissue paper. Close the windows.  And make sure your child is down for a nap or happily occupied in a pack-n-play or something. Exacto knives are no joke!!

Step 1.  Figure out which part of the box you'd like to have as the bottom. Some people would like to leave on the top flaps so as to let in or keep out some light. Me I cut those suckers off the first box I made. Anyhow...

Step 2.  Use your ruler and marker to measure in approximately 1.5" or 2" on all sides of the top and sides of the box. Then cut out these rectangles. It should look like this:


Step 3. Tissue paper time! Cut three pieces to fit these windows you've just cut out. And tape them ever so carefully. Not like I did, do a better job than that!


Step 4. Create a thin opening on the far end of the top side of the box for your posterboard to go down. And if you're crazy anal about raw edges then you'll tape up the cuts so the posterboard will go in easier.  


Step 5. Cut the posterboard to fit and slide it in!


And then, Step 6. Place your cute little something inside and take a couple pics. 


There's an ugly shadow behind him when it should be below him, BUT I didn't have any lights on AND the sun was behind me so... If you want to maximize the awesomeness that comes with this then you should use lights on either side and on top and you can filter it how you see fit ^_^

Here's the finished product pic:


What do you think? I could have gone to a site like fotofuze.com and whitewashed the background but this is how it looks now. Unedited. 

That's all folks, and it cost me a whopping $0.60 + tax. Ouch. Don't tell DH!! So, questions? Comments? Concerns?

Friday, March 16, 2012

Spring Cleaning

Please pardon my absence. I've been busy cleaning.. and prior to that setting up a cleaning schedule for myself. Before this schedule I never got anything done. I'd do a little here and a little there and still nothing was happening. SO, I decided to get down to business. Here's how I've got it looking so far


  1. Kitchen
  2. Bathroom (upstairs) and dust & sweep
  3. Bathroom (downstairs) and vacuum & mop
  4. Bedrooms and linens
  5. The Dining room, and Living room tables
  6. Windows and Mirrors and The CAR!
  7. Relax and hope nobody messed up the darn house!!
The reason they are numbered instead of listed as days of the week are because DH isn't off on the weekends so I'll just get things in when they fit. Today is day three, I should be downstairs cleaning his bathroom... I do have other commitments too though! Haha, I'll get to it in a bit. Other things I also like to fit into the day are taking a walk with the boy-o and taking a breather at the park if I can. Also working on my Etsy shop!! Gotta take time out for me. 

Reading: I finished The Help and liked it very much. And yesterday (Day 2) I cleaned the entire bathroom and wasn't bored or feeling like complaining, because I was listening to The Hunger Games on my phone!! I finished the whole book yesterday and that, is, amazing!! I'll start book two (Mockingjay) here today and maybe finish it tomorrow. Then next will be book three (Catching Fire) and then maybe The Little Giant Of Aberdeen County. I've got all these books downloaded on my phone from my local library using the Overdrive Media app on my iPhone. I AM SO THANKFUL. This will keep me sane I believe..

Also keeping me sane are my Etsy Treasury Team members. They are so supportive. It's wonderful. I'd still be moping and unproductive without them. I can't believe I've been on Etsy for 3 years now and have barely made a dent. Shame on me. But thanks to them and my hard work I've managed to boost my views and sales. Awesomeness!!

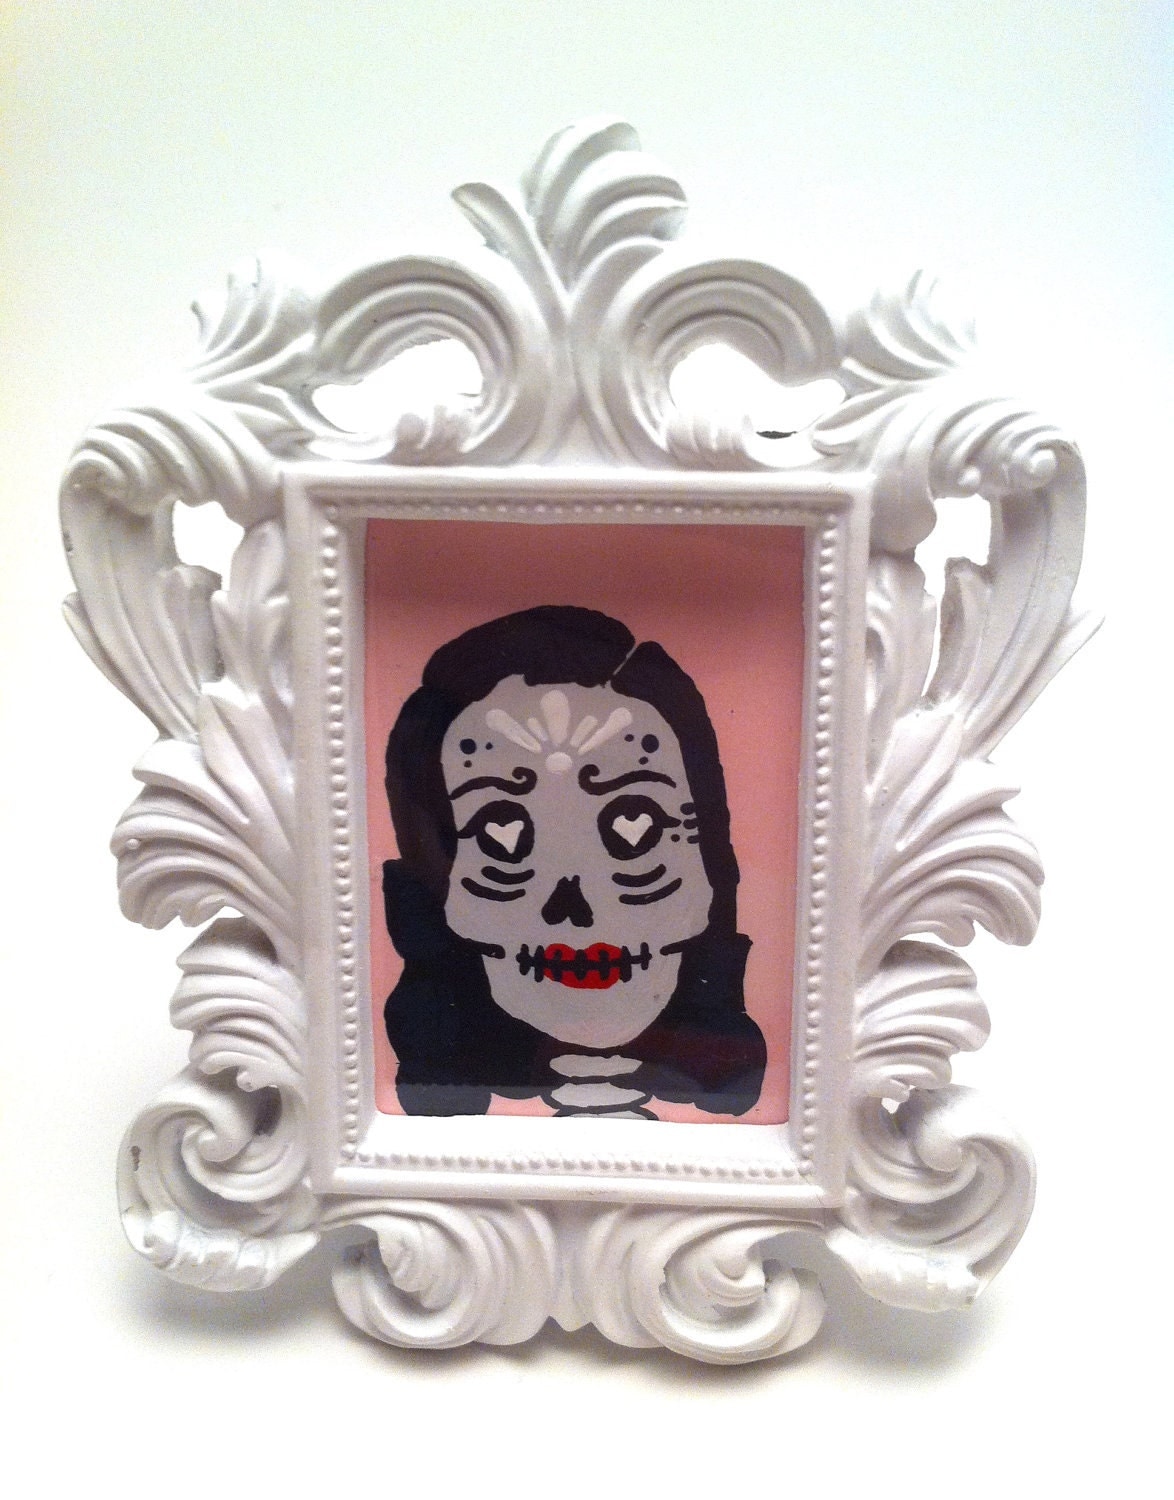
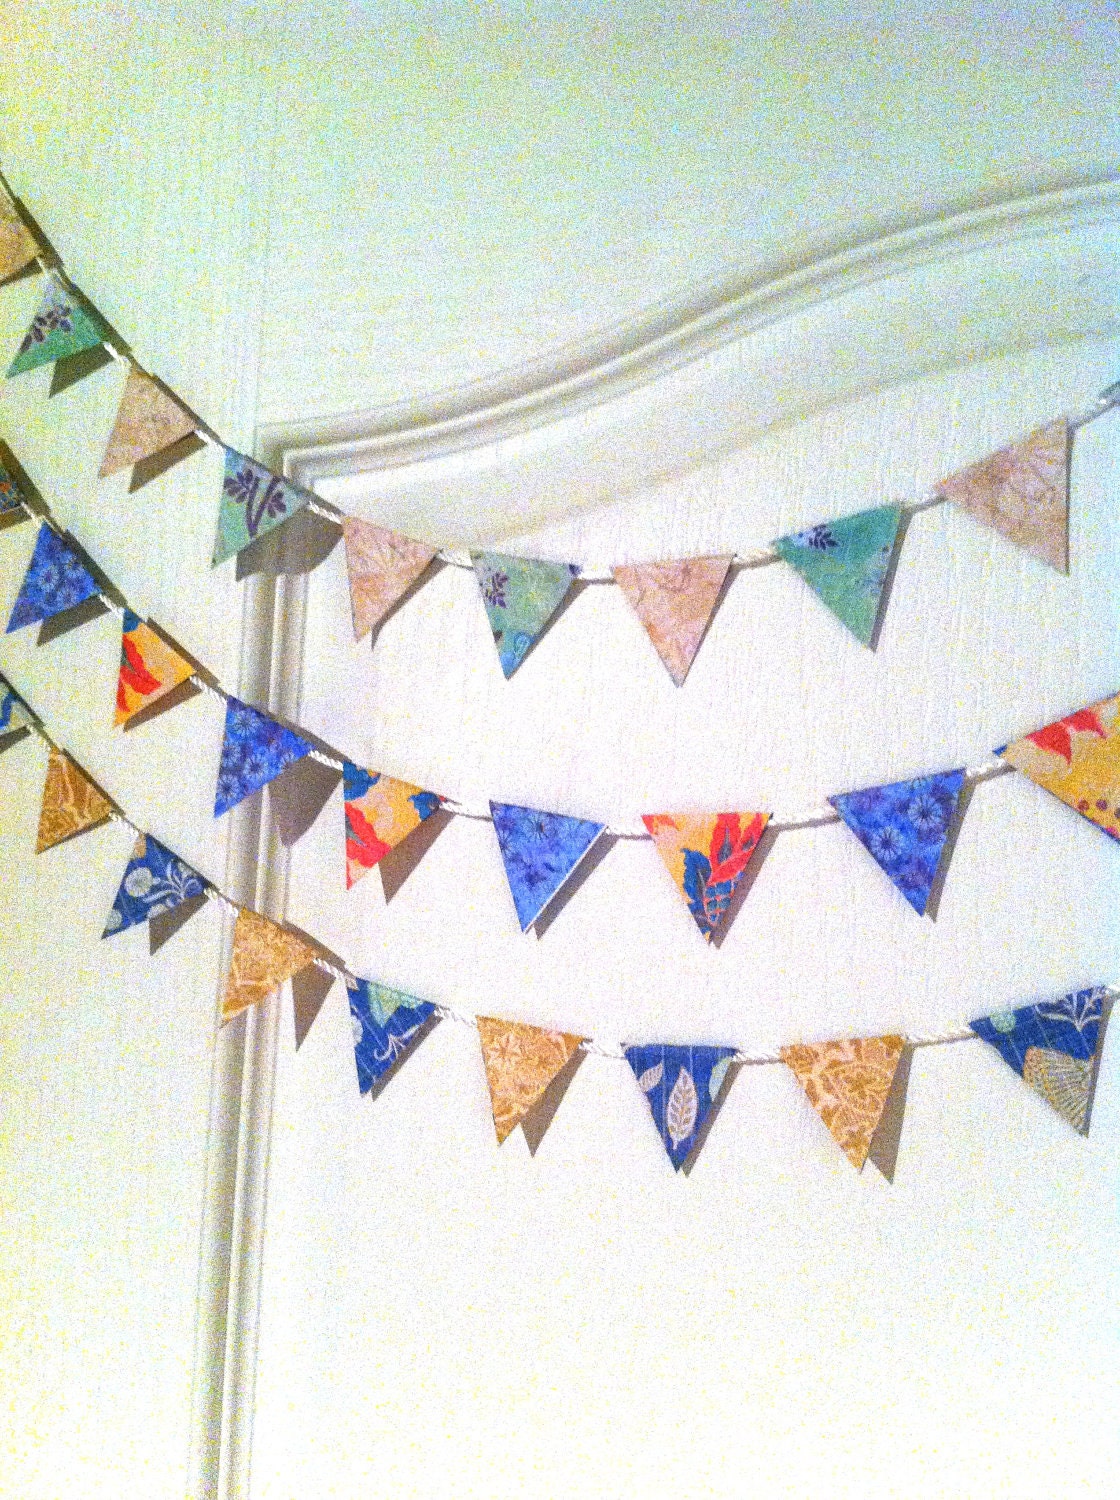
New Items: This last week I added to the shop a listing for 5 DIY mini buntings. They would look so cute in a cubile. I also added a Dita Von Teese inspired sugar skull painting. Isn't she a bute?!?

I'd love to also make some cubicle party in a bag/box type of deal. I think it's would be nice. A card, a couple balloons, a bunting, a candle. No confetti though. That stuff is a mess. 

Oh and this week I made an attempt at a Pie for Pi day 3.14. For dinner we had pizza and for dessert I made this Lemon Pineapple Pie. it was good, I liked it. But I guess DH only likes Pizza Pie, he said he prefers cake... So I won't feel bad eating it all then!! It was my first time doing the basketweave and it came out nicely. Next time I will do pineapple tidbits or crushed instead of chunks. Too chunky. Also I will be sure to dust the top with sugar. it added a sweet crunch. Lovely.


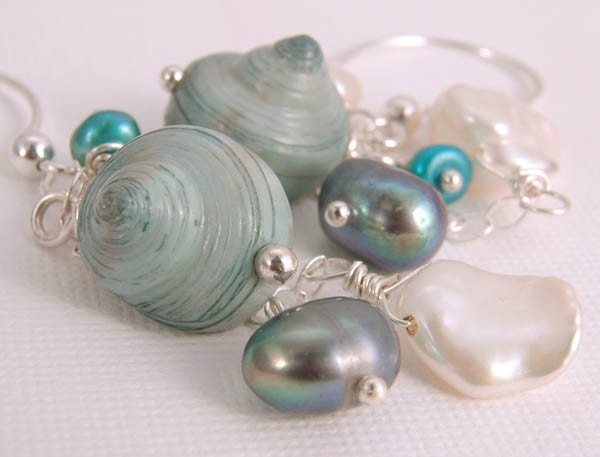
So now I know I probably haven't said much and I'm still going to say good bye. And I will leave you with my latest treasury I've called "Life is a beach". Please click on the link and check it out. In the meantime here is a teaser of one of the awesome items featured there:


You can find these beautiful earrings here at Lindesigns shop on Etsy. Aren't pearls gorgeous?!?!

I'm off to get to work. It's Day three and I've got plenty to do. I'm also putting away my maternity clothes. No way I ever want to wear that size again so SAYONARA clothes!!

Xo,
Bri


Tuesday, March 6, 2012

Tuesday Blahs

Well I meant to post yesterday but that obviously didn't happen :( My apologies. So let's do a quick recap of the last week.


Oh there's this Home Accessories shop right across from my post office in Southfields. I've always just driven past it but last week I stopped and checked it out. Oh My goodness their merchandising is a dream. It's as though people were having a tea party or something and just got up and left. Thats just upstairs though. The store is called Jasmine. They've got a bunch of brightly colored gorgeous items for sale (not cheap mind you!) And it's was an inspiring eye opening visit. I'm glad I stopped in.


I finally put my sons clothespin wreath up in his room and now it is holding his cards. That de-clutters the room a bit ^_^.  Oh yes, the GIVEAWAY. Congrats to Jennifer Landers who won the mini envelopes from last weeks blog. For those of you interested in doing Facebook giveaways you may want to look into the Sweepstakes App for your business page. It increases your "likes" if you do it correctly and follow all of FB's many many confusing guidelines.


I've also brought in a new line of envelopes. These are bigger. Able to fit a gift card or business card. They come with a note card though. My favorite are the ones with the tiny birds.

These pictures are dark but you can view some of the envelopes here on my shop page.


In other news, My wonderful DH was tidying up the house a bit and smashed a ruler or something into the side of my expensively hand constructed light/studio box... AND THEN the delightful DS decided to join in and stuck his hand through the top... THANKS GUYS -___- So in a future blog I'll show you how I made it, and no I was being dramatic. It only cost me $2 to make because I needed to buy posterboard. Otherwise I just used everything else I already had in the house.  In the picture you can see I can't use this thing anymore, I'd have to replace the tissue paper, which isn't a problem but I've been meaning to make a larger one anyhow and so here's an excuse.


What do you think of my mini envelopes??

Alrighty then, lastly I shall say a few more things. 1, I've finished Jodi Picoult's Keeping Faith. I give it 4/5. and now I'm reading The Help. I've been meaning to get it and then didnt want to spend the money so looked to get it at the library but that was more work, so what did I do? I downloaded it from the library onto my phone! How cool is that!?!?
2. DH finally put PhotoShop on my dang laptop!! YAY!! Now I can bring back my digital items to my shop! I LOVE IT!!
3. CHECK OUT THIS TREASURY!! I just made it and It's called Martha Eat Your Heart Out. In dedication to one of my favorite women in the entire world, Martha, You rock!
Here's a pic of one of the items which can be purchased here:

Awesome stuff in their Etsy shop. Thank you all for reading!

Monday, February 27, 2012

Happy Monday

Hooray! Good news for everyone.

I'm hosting another giveaway on Facebook. This time it's for my newest and cutest item, Mini Envelopes. They are so cute. Can you imagine finding a tiny envelope and opening it to find a cute little sentiment from your secret admirer? You could leave them in your kids lunchbox, put them in those plastic Easter eggs, embellish scrapbook pages with them... it's really up to your imagination. So here's the link for that. Good Luck! Oh and also, you get two chances of winning because the winner and the person that referred them will receive a prize :D

In other news, I FINISHED THE DARN PLARN BAG!! HOORAY!! Ok, If I had focused on it more int he beginning it would have been done sooner, but hey, give it a look!


the SC stitches made it flare out and the SC, CH skip made it go in... So next time I think just the bottom in SC and everything else SC, CH skip. What do you think? My bag-o-bags. What would you make with plarn?


 I also finished that clothespin wreath, last night, or this morning.. I had to cut the hanger twice, didn't have a hot glue gun so went about twisting the wires with vice grip tools DH has (thanks dude) and then had a dilemma with the pointy parts... Which is when I had that a'ha moment >_< I was mad at myself for not thinking of this sooner, Instead of twisting the wires why not just use freaking ELECTRIC TAPE!! Gah, next time.

It's definitely not the prettiest thing :( But I'll use a wide ribbon later and hopefully hide that hideousness.
Also new in the shop are my Victorian framed Sugar Skull Toothpick Paintings. I love them, but they're not for everyone. So if you don't like them that's ok. I don't like cotton balls =P So there! heh

No really, I hate cotton balls. And corduroy, and velvet... it's a sensory thing.

I'm finally starting to feel like even though my shop has a few different types of products, that it's coming together. I don't know, the envelopes just bring me so much happiness.

So thanks again everyone for your kind words and encouragement. You are awesome.

Xo,

Bri

P.S. Go enter to win that giveaway!!